From sign-up to your first booking
First the six steps you take to set up, then what your clients do when they book. You can try your clients' side now on a demo booking page.
What you do
Six steps, in this order. Come back to steps 3 to 5 whenever something in your business changes.
-
1
Create your account
Sign up with your name, email address and a password. We email you a link to confirm the address, and the setup wizard opens once you've clicked it.
-
2
Run the setup wizard
The wizard has three screens. On the first you enter your business name, the last part of your booking page address (filled in from the name, and you can change it) and your timezone. On the second you pick your trade from the ten on offer. The third shows what that trade's preset will set up: services, booking rules and weekly opening hours. Finish, and your dashboard opens.
The wizard lists every timezone and starts on the one your browser reports. You can change it later in your business settings.
-
3
Check what the preset filled in
Your services arrive with durations and buffer times, and with starting prices for the trades that usually list them. Your opening hours and booking rules are set too: how much notice you need, how far ahead clients can book, and how close to the appointment they can still cancel or reschedule online. Change any of it, add services of your own, and switch off the ones you don't offer.
-
4
Set the working hours
Your opening hours tell clients when you're open. The times they can book come from each person's own weekly hours. Yours start as your trade's opening hours, so your booking page has open times from the moment the wizard finishes; change them on the Availability page. Then add the people who take appointments. You create a login for each one with their name, email address and a password, and they can keep their own weekly hours and time off up to date, or you can do it for them.
-
5
Make the booking page yours
In your business settings, give the page a title and a short description, upload your logo and a background image, and pick a brand color for the buttons. An SEO title and description decide how the link looks when it's shared on social media. The page is published when the wizard finishes; switch it to draft if you'd rather keep it hidden until everything is ready.
-
6
Share your link
Your booking page address ends with the name you chose in the wizard. Put it on your website, your social profiles and your email signature. New bookings show up on the calendar in your dashboard, and you get an email for each one.
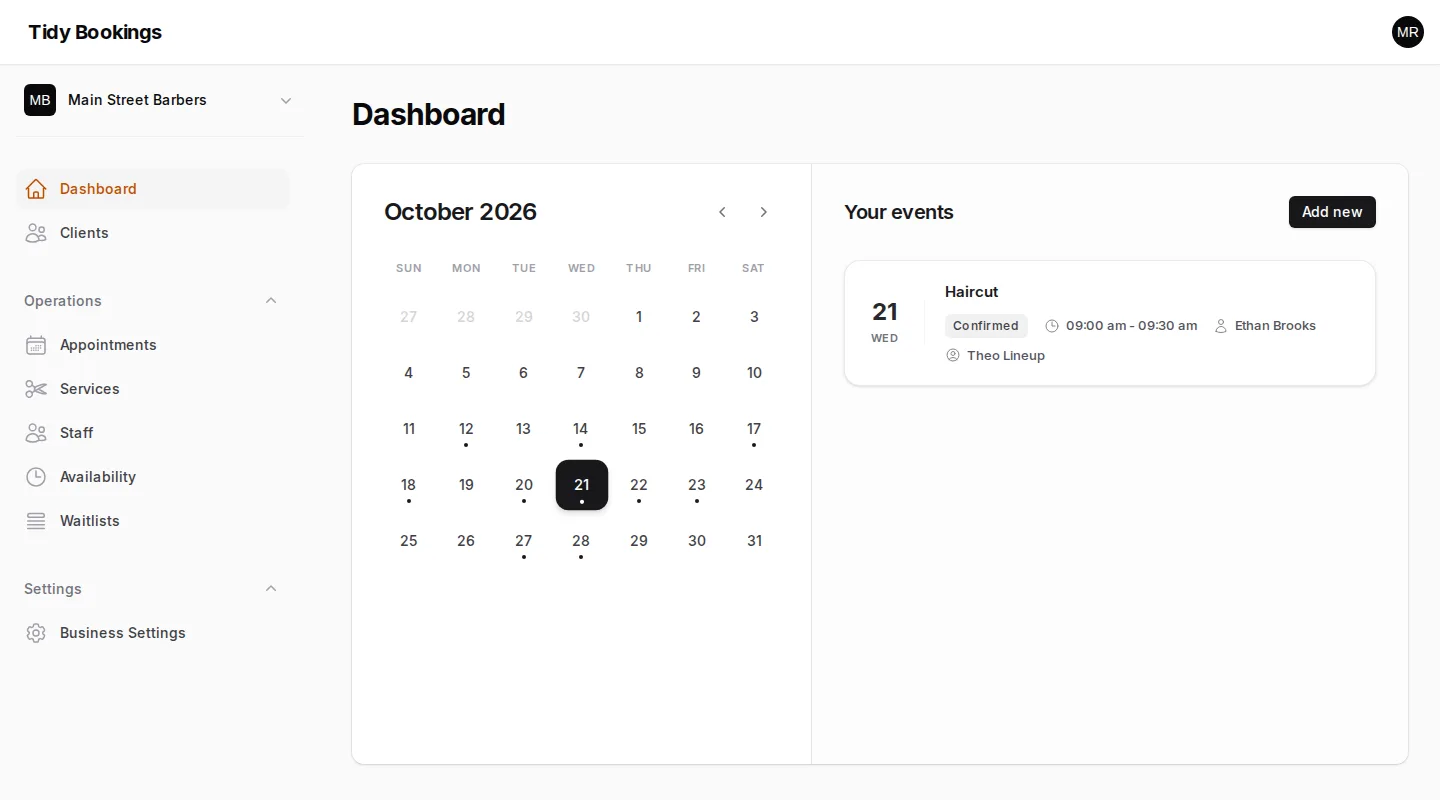
The appointment calendar in the dashboard, with demo data.
What your clients do
Every booking page has the same five screens: service, staff, date and time, details, and a final check. Then the emails take over.
-
1
Choose a service
Your client opens your link and sees your services, each with how long it takes and, if you've set one, its price. Your opening hours are on the page too.
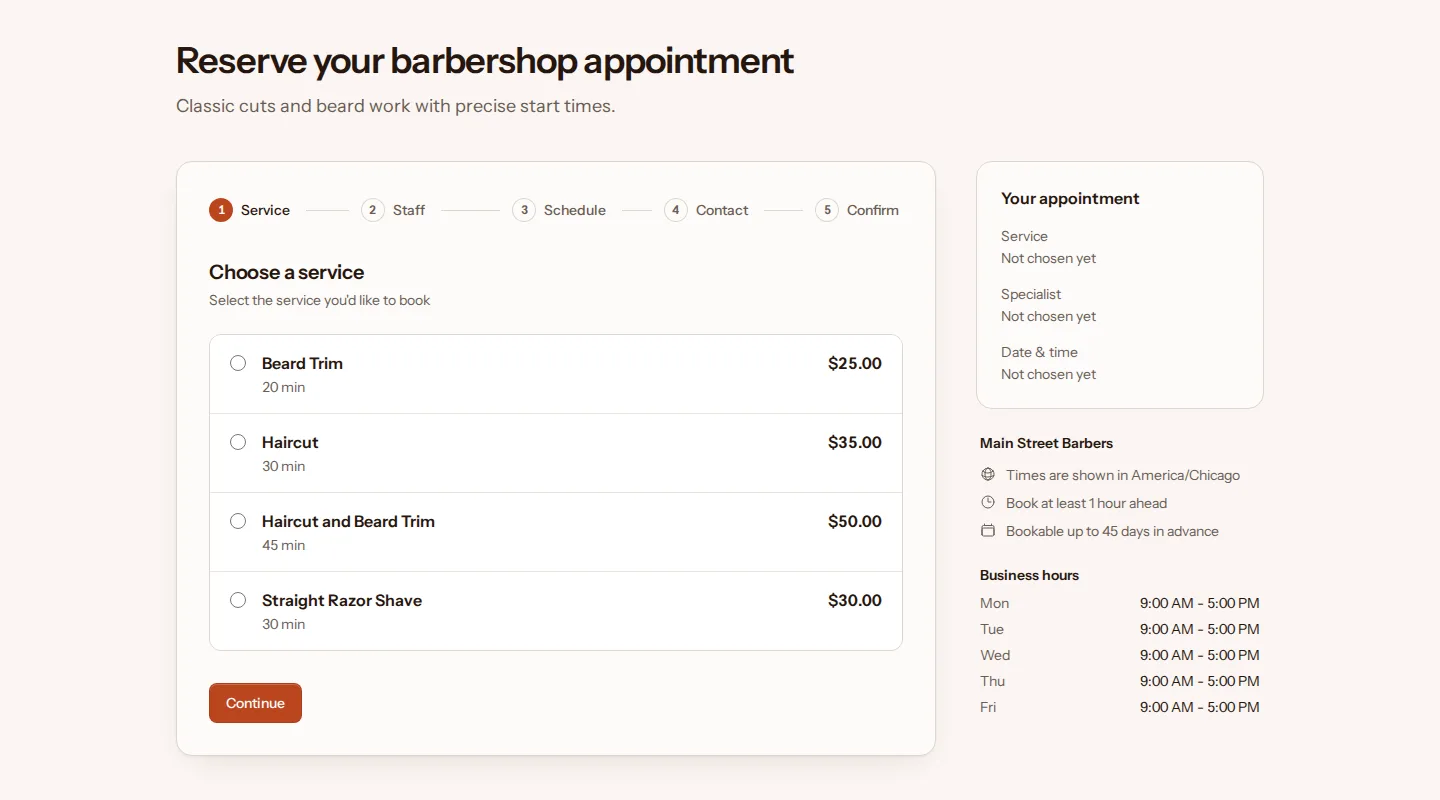
The first screen of a demo barbershop's booking page. -
2
Choose who
They pick the person they'd like to see, or "No preference" for whoever is free first.
-
3
Pick a date and a time
Only open times are shown, in your business's timezone, from your notice period up to the end of your booking window.
If the day they want has no open times, they can join that day's waitlist with their name, email and, if they like, a preferred time. When a booking on that day is canceled or moved, everyone on the list gets an email.
-
4
Enter their details and confirm
They book as a guest with a name and email address, plus a phone number if they want to add one, then check the details on a review screen and confirm.
-
5
Get the confirmation email
It has the appointment details, add-to-calendar links for Google, Outlook and Yahoo, and a private link for managing the booking. You and your staff get an email about the new booking at the same time.
-
6
Get a reminder
A reminder email with a manage link in it arrives a day before the appointment, or a day before online changes close if your cutoff is a day or longer.
-
7
Reschedule or cancel, up to your cutoff
The manage link opens a page for that one booking. Your client can move it to another open time with the same person, or cancel it and give a reason if they like. Each change sends an email to them and to your team. Once your cutoff has passed, the online options close and they contact you directly.
Start at step one
Free, with common-sense limits. No card needed.